Showing posts with label diorama. Show all posts
thumbnail

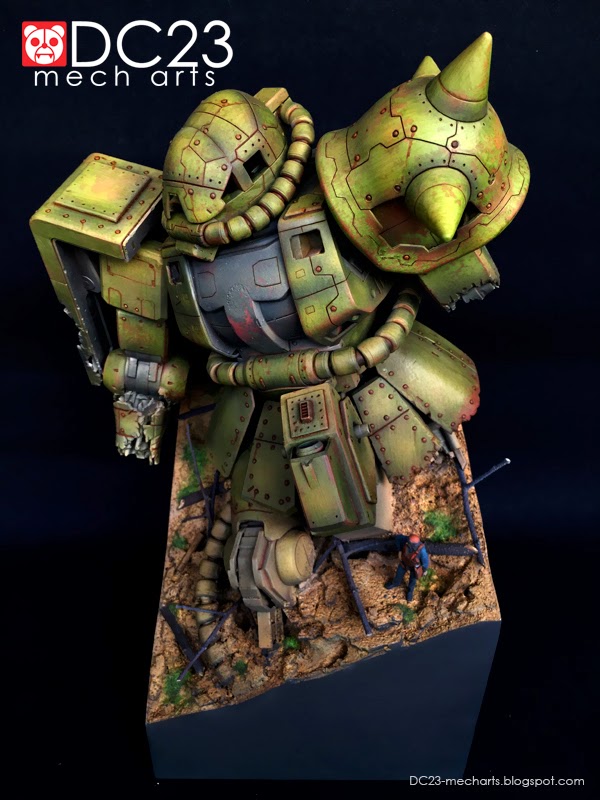
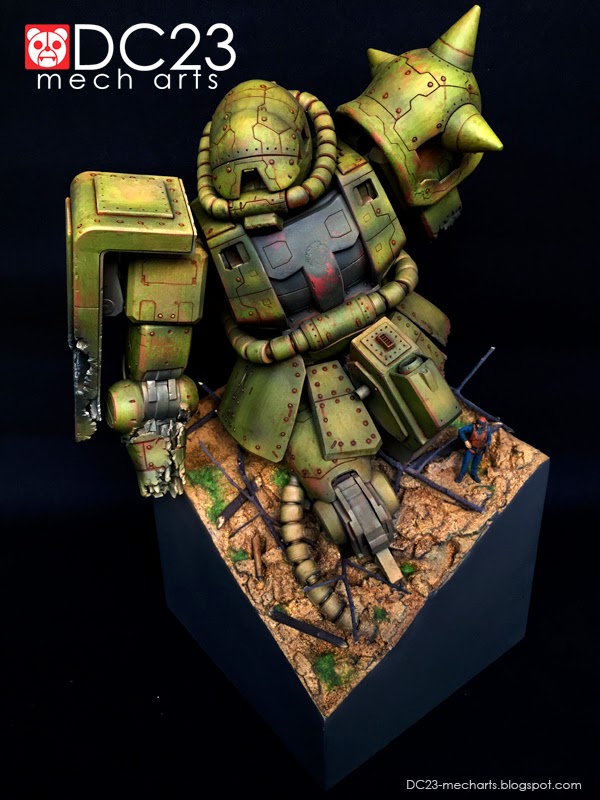
1/48 Mega Scale Zaku Diorama " Dead Turtle " modeled by Don Suratos akaDC23


Mega Scale Zaku Diorama Dead Turtle modeled by Don Suratos akaDC23photo


Just finished this piece today. I wanted to finish something quick to start the year on a productive good note. This was my old sponsored 1/48 Zaku kit I got from Greattoysonline.com way back. I originally plan to use this for a huge hangar diorama, but I just cannot find enough materials ( 1mm rods and tubes ) to work on that project.


I was working on a few commissioned works during the December holidays ( MG Zeta Karaba and MG Z'gok ) but I really felt like rushing and painting something quick to start the year with a conpleted work. So I ended up finishing this quick painting project.


As you can see, I wanted to paint it as soon as possible thus I failed to detail the other parts to match the detailing of the head and shoulder armors. I did manage to add a gazillion of rivet work all over the kit to somehow give it a consistent look. The rivets used were cheap sewing pins which is not as easy to install ( you need tweezers ) as it looks. I also failed to add battle damage to the amputated right leg as I really wanted to paint already.


Although I feel I could have done more modifications and worked with this kit for another week, at least I had so much fun painting this with my old stock of Vallejo paints and washes before the holidays end and before I report back to my dayjob.


The kit was primed with Vallejo Grey Surface Primer, Vallejo Rust colored Model Colors, some Vallejo Game Colors and Vallejo Model Airs. The kit was weathered with Vallejo washes, inks and pigments and the kit was sealed with Vallejo Satin Varnish! Dang I love my non-toxic Acrylic paints ( lol )!


I really like the flat look of the Vallejo Satin Varnish. It has a very subtle sheen rather than a really chalky flat look! You just need to mix around 10% of Vallejo airbrush thinner to make the varnish more suitable for airbrush use.


I learned and re-learned a lot of weathering techniques with this build. Much like the modifications, I could paint this for another week, but felt the kit has served its purpose already.. now moving on to my other projects. 


Hope you like this post ( will edit this post and add gazillion of photos soon ).


Thanks as always for dropping by! Until next post guys! Just enjoy the hobby! :)


Mega Scale Zaku Diorama Dead Turtle modeled by Don Suratos akaDC23photo


Mega Scale Zaku Diorama Dead Turtle modeled by Don Suratos akaDC23photo


Mega Scale Zaku Diorama Dead Turtle modeled by Don Suratos akaDC23photo


Mega Scale Zaku Diorama Dead Turtle modeled by Don Suratos akaDC23photo


Mega Scale Zaku Diorama Dead Turtle modeled by Don Suratos akaDC23photo


Mega Scale Zaku Diorama Dead Turtle modeled by Don Suratos akaDC23photo


Mega Scale Zaku Diorama Dead Turtle modeled by Don Suratos akaDC23photo


Mega Scale Zaku Diorama Dead Turtle modeled by Don Suratos akaDC23photo


Mega Scale Zaku Diorama Dead Turtle modeled by Don Suratos akaDC23photo


Mega Scale Zaku Diorama Dead Turtle modeled by Don Suratos akaDC23photo


Mega Scale Zaku Diorama Dead Turtle modeled by Don Suratos akaDC23photo


Mega Scale Zaku Diorama Dead Turtle modeled by Don Suratos akaDC23photo


Mega Scale Zaku Diorama Dead Turtle modeled by Don Suratos akaDC23photo


Mega Scale Zaku Diorama Dead Turtle modeled by Don Suratos akaDC23photo


Mega Scale Zaku Diorama Dead Turtle modeled by Don Suratos akaDC23photo


thumbnail

Full Styrene Custom Base and Texturing with Paints


Full Styrene Custom Base and Texturing with Paintsphoto


I wanted to do a quick project that would help me focus on painting and weathering so I decided to pull out an old unfinished project and crafted a quick base using styrene. As I've said in my previous post HERE, I am trying to improve my bases and the overall presentation of my builds. I want my build to look like sculptures.


I basically used my old 1/48 Zaku and removed most of it's limbs. I will need to detail up and add battle damage effects on the kit before painting. But painting and weathering of this project should be fun as I am working on a 1/48 scale. Meaning rust streaks and paint and armor chippings are very much visible unlike on 1/100 kits.


Full Styrene Custom Base and Texturing with Paintsphoto


Full Styrene Custom Base and Texturing with Paintsphoto


Full Styrene Custom Base and Texturing with Paintsphoto


Full Styrene Custom Base and Texturing with Paintsphoto


Full Styrene Custom Base and Texturing with Paintsphoto


After setting up the pose of the limb-less kit, I then started painting the ground work. As is obvious with the photos above, the ground work and the whole base is made entirely of styrene. I used PU reducer to melt all those styrene chips together.


I am using the paints to create rough texture and not "paint" the ground work. After the modifications on the kit, I will be re-priming the whole thing using Vallejo Surface Primer ( Black ). I want to show everyone how I quickly added texture to the smooth surface of the styrene ground work with paints. I left this curing earlier today and should be nice and hard once I get home from work.


I basically hand brushed 2 coats of Vallejo Grey Primer. It surprisingly dried after around 30 minutes and dried smooth. Weird as I was not careful and just applied the primer thickly. Apparently the Grey primer has some sort of self-leveling properties.


Full Styrene Custom Base and Texturing with Paintsphoto


I think but I am not sure, the Vallejo Acrylic Studio are the cheapest paints from Vallejo. This huge bottle only costs around 8 small bottles of Vallejo Model Color. Such a bargain for a paint this much. I was expecting lesser quality in terms of opacity from this paint. However the photos shows just a couple of coats which reveals that it is very opaque! Pretty high pigment count for it's price range.


I do think lighter colors of the Vallejo Acrylic Studio are not as opaque. As lighter colors tend to be more transparent and requires more coats of paint to fully cover the surface.


Full Styrene Custom Base and Texturing with Paintsphoto


Full Styrene Custom Base and Texturing with Paintsphoto


I did not let the Vallejo Acrylic Studio to dry at all... I immediately dabbed some Vallejo texture paint ( Oxid Paste ) to the surface. Resulting to some blending of textures and colors. I honestly need some Vallejo Black Lava texture paints as that paint has heavier or has a rougher texture. Adding a bit of Black Lava paint should give more variation to the texture.


Full Styrene Custom Base and Texturing with Paintsphoto


Full Styrene Custom Base and Texturing with Paintsphoto


This will dry to a nice rubbery - plasticky material and once you dabbed more paint or texture paint, you will be producing a rougher texture. The textures shown on the photo were hand painted on a very smooth ( primed ) styrene ground work. So painting over this surface should produce a rougher texture.


I then need to modify the kit and add battle damaged effects soon. Once I finished working on the kit, I could then re-prime the whole piece and start the actual painting. As I've said, I used the paints above to create the basic texture of the ground work and not to paint the kit. Stay tuned and you'll see updates of the results soon!


Last tip with dabbing paints and using texture paints... make sure you use really old OR really cheap brushes as texture paints ( much more dabbing texture paints ) will ruin your brushes. Ruins brushes much more than dry-brushing actually.


Thanks as always for dropping by! Until next post guys! Just enjoy the hobby! :)


Full Styrene Custom Base and Texturing with Paintsphoto


Full Styrene Custom Base and Texturing with Paintsphoto


thumbnail

Presentation is Everything... Improving my Gunpla Dioramas


Improving your Gunpla Dioramasphoto


I love dioramas so much I always tend to focus on working on them most of the time. Although I just make complex bases ( not considered as dioramas by some if it does not convey a story ), but the bottom line is that I enjoy working on the bases sometimes a bit more than the actual kits themselves.


I am looking to improve the bases ( or frames ) of my dioramas this year... Most of my older builds have lousy made bases as you can see HERE, HERE and HERE.


I have been away from Gunpla and worked on some minis the past couple of years, thus I am so influenced by the super talented painters of the miniature world. Unlike Gunpla, where you could get away with basic skills and airbrushing... Miniature painting ( and of course sculpting ) is done by top level talented artists.


As it is obvious with my choice of medium and paints, I am greatly influenced by the miniature painting world. Thus moving forward I will be focusing on creating and presenting my dioramas the same way top level miniature artists present their work.


There are so many ways of presenting your plastic pose-able robots. Personally, I like my Gunpla to look like serious sculptures. I like my future builds to look like well made sculptures on bases ( story or NOT ). All of my bases or dioramas will be presented the same way the top level artists and diorama makers of the miniature world present theirs.Wish me luck... and I hope you find your own style as well.


Improving your Gunpla Dioramasphoto


Improving your Gunpla Dioramasphoto


Thanks as always for dropping by! Until next post guys! Just enjoy the hobby. :)

thumbnail

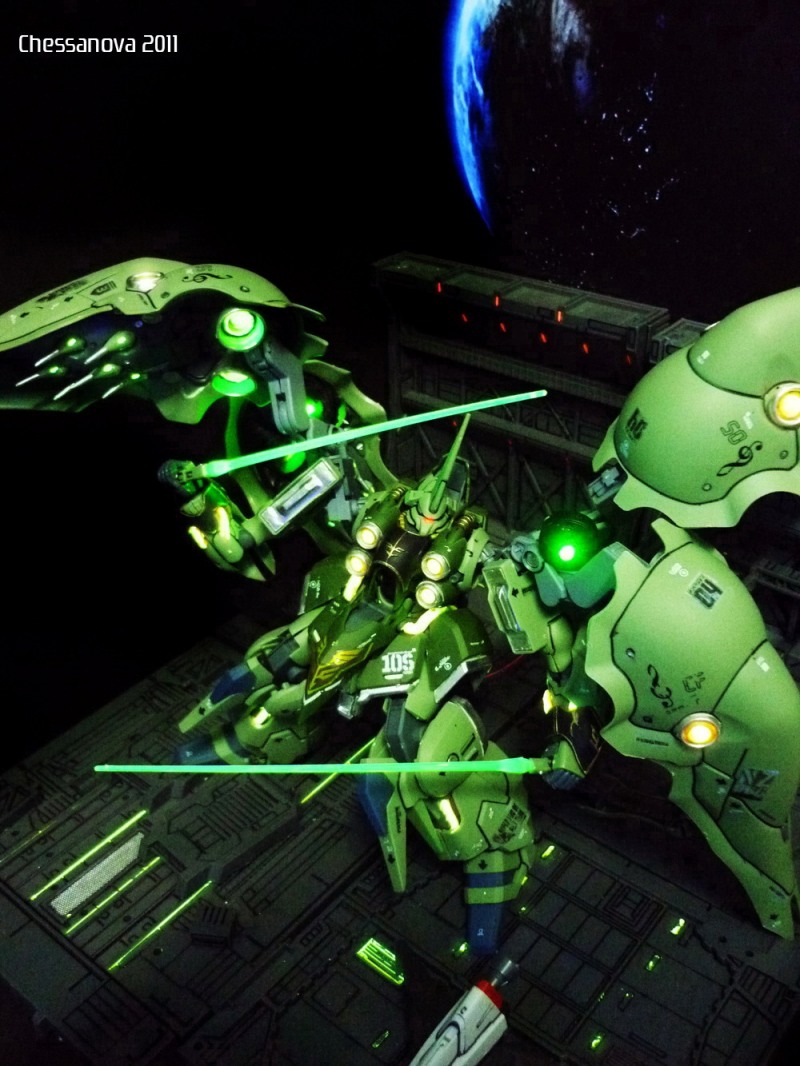
my TOP picks for G-SHOT 2011 Best Diorama


my TOP picks for G-SHOT 2011 Best Diorama Photo


Good dioramas should have a well done kit and a well done base, great dioramas should be telling some sort of a story.


We have some entries at G-Shot 2011 Best in Diorama category that has well done kits and bases and tells a clear story. They are also shot properly in a nice angle and composition that creates more interest and makes the audience want to see more.


I love dioramas specially Sci Fi dioramas so much and it is fun judging ( together with other judges ) this category. Needless to say this is my most fav category and my fav part of this hobby.


We are currently judging all the entries and Gundam Guy should be announcing the winner soon! I wish everyone good luck. Now here is the Official post at Gundam Guy's...


my TOP picks for G-SHOT 2011 Best Diorama Photo


my TOP picks for G-SHOT 2011 Best Diorama Photo


my TOP picks for G-SHOT 2011 Best Diorama Photo


my TOP picks for G-SHOT 2011 Best Diorama Photo


my TOP picks for G-SHOT 2011 Best Diorama Photo


my TOP picks for G-SHOT 2011 Best Diorama Photo


my TOP picks for G-SHOT 2011 Best Diorama Photo


my TOP picks for G-SHOT 2011 Best Diorama Photo


my TOP picks for G-SHOT 2011 Best Diorama Photo

thumbnail

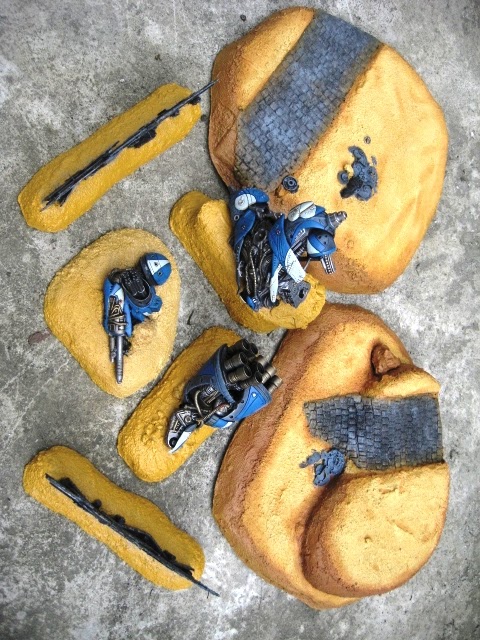
mini WAR GAMING table WIP - painting


mini WAR GAMING table WIP photo


I managed to squeeze in a few hours this weekend and I finished painting a few pieces for my mini War Gaming table modular pieces ( commission work ).


I have yet to dry brush the terrain and have yet to weather the " ruin " pieces. As always I ran out of a few supplies again and could not finish the pieces you see in the photos. The two " watch towers " are almost done and should have been done if only I have super glue and black spray paint. The other pieces was painted with Vallejo paints as usual and will be sealed with future later.


I will then weather the pieces with enamel washes and some Vallejo paints tomorrow ( once the future has cured ) and seal them in flat coat to finish it up. For the meantime here are a few photos for my client to see...


mini WAR GAMING table WIP photo


mini WAR GAMING table WIP photo


mini WAR GAMING table WIP photo


mini WAR GAMING table WIP photo


mini WAR GAMING table WIP photo


mini WAR GAMING table WIP photo


mini WAR GAMING table WIP photo


mini WAR GAMING table WIP photo


mini WAR GAMING table WIP photo


 mini WAR GAMING table WIP photo


mini WAR GAMING table WIP photo


mini WAR GAMING table WIP photo


mini WAR GAMING table WIP photo


mini WAR GAMING table WIP photo


mini WAR GAMING table WIP photo


Powered by Blogger.