Showing posts with label BMKWC 2011. Show all posts
thumbnail

Toymaker versus DC23 face-off WIP - big butt done!


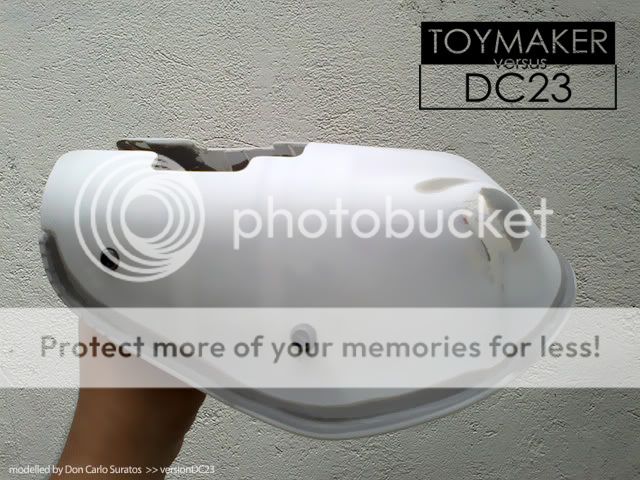
As I've said, I can't really do much Gunpla during weekdays this month. My friggin' work schedule simply does not allow me too even hook up in Skype. However, I was able to apply some epoxy on the corners of the butt that needed some repair as seen in my previous post.


I was also able to successfully add a LIP around the edges of the whole butt. I simply forcefully glued a 3mm square Tamiya pla rod around the edges and applied epoxy with my fingers in between the butt and the square rod. After letting the epoxy cure for 3 days, I then sanded the square " lip " to make it round and also sanded the corners.


Their are still a few errors on a few parts but nothing a nice couple of layers of Tamiya putty would not fix. I also had to bore the holes for the Kotobukiya parts as I reinforced the innards with a thick layer of Epoxy. I highly doubt any modeling stress would deform this really hard shell of pla plates and epoxy now.


I apologize for the crappy out of focus photos as my camera is with my sister in law. This is the very same reason I cannot show some Zeta updates today but will surely take photos for tomorrow's update as I will have my camera by then. Anyways, here are a few more crappy shots of my butt...


Thanks for dropping by! Til' next update! :)


thumbnail

Toymaker versus DC23 face-off WIP - big butt!


As most of you know I am not good in scratch building, It was a bit of surprise for me though that I kinda pulled off at least the basic shape of the main part of my The O II conversion. I think more or else I was able to get the shape I was aiming for. I just need to pile pla plates or put putty on the damaged corners and sand it smooth and curvy. A visible crack on both sides will also need some reinforcement on the inside and a bit of putty work outside.


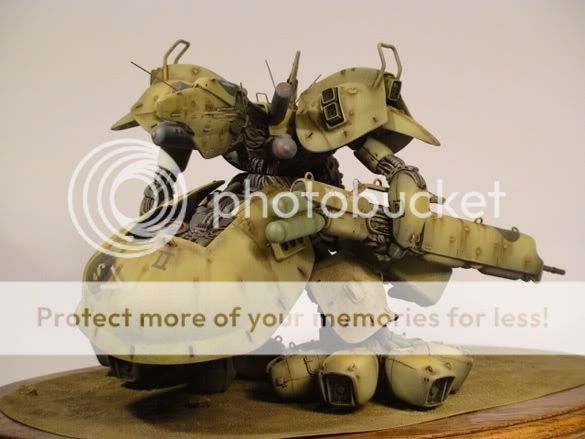
The main obstacle of the but is the big hole that I was luckily able to achieve. The layers of .5mm pla plates I added last night was able to make the shell really strong and thick on some of the crucial curved areas. I was aiming for the hole for the main engine block at the butt, much like what you see in the photo below...


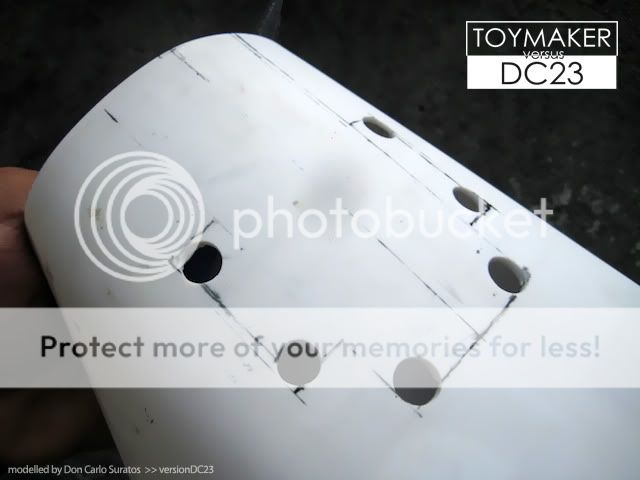
Now here are a few more photos on how I as able to achieve the hole for the main engine block...


First I bored large holes on the corners coz I do not want sharp corners in this build. I think I will be sanding down any corners so that the overall look is nice and curvy. After drilling the large holes, I sort of connected the dots with my Tamiya scriber and sawed it off. I was really afraid while I was doing this as the butt might lose it's curves once I have removed a significant amount of support.


Gladly all those layers of .5mm pla plates that I layed down hardened to form a thick 2-3 mm shell at the most crucial parts. The shell retained it's shape even after I have remove the hole where the main engine block will be placed. Voila! I have the main shape and the biggest scratch building hurdle of my The O II conversion is done.


I will be leaving this butt as it is as I will work on the MG Zeta now. Plus one of the main features of this build is the butt, thus I do not want to rush and finish early. I also need to research a bit further on how I would do the engine blocks, the details underneath the butt and the detailing and modifications of the butt itself.


I will now sit back and wait for Toymaker's first update. ;)


Thanks for dropping by! Til' next post! :)


thumbnail

Toymaker versus DC23 face-off WIP - basic butt shape


I wanted to start on this project a bit for a couple of days now but I eventually gave in to the urge after seeing this thread at ZeroGunz! Initially Kenny Lim aka Toymaker and I agreed to build a conversion of the O II Hauer. Kenny eventually thought of creating and designing his own version as he mentioned in his post. Our initial take off date is June 2011, but I just had to ride the mood to at least build the basic shape of the butt.


I had a chat with Kenny earlier today and I asked if I could start building mine which is 3 months earlier than the original date. He told me it is ok but he can't start on his own yet, I just feel I had to ask his permission as I think working on it earlier than the agreed date would be cheating.


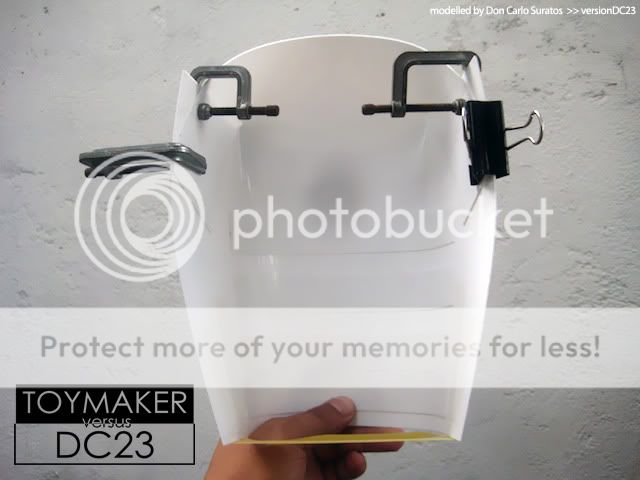
I won't be working much on this kit though as I still have a lot of other Gunpla projects. As I've said, I just have to ride the mood and at least build the basic shape of the butt of the O II Hauer. Anyways, this is made of a 1mm pla plate that was forcefully bended to form the shape.


The butt of my The O II will be 8 inches long, 5 inches wide on the widest part and 3 1/2 inches on the tallest part. I have reinforced the basic shape with strips of .5mm pla plates to help retain the shape of the butt. I will have to pile up or build up on the pla plate strips to make sure the shape is intact once I remove the tapes and clamps.


I hope to build up enough .5mm pla plate strips and form a really hard shell once the cement has cured. Once I have the shell, I could do anything with it as I won't worry with the butt loosing it's shape anymore. Now here are a handful of photos showing the basic shape of the butt...


Thanks for dropping by! Til' next post! :)


EDIT: I laid down and piled up more .5mm pla plate strips after dinner, and I have used 2 a4 sized sheets of Tamiya plates. I think this will be really strong by tomorrow morning when the cement has cured on the layers of pla plates.


However I did some experiment and added a thick layer of Epoxy on the corners. I am pretty confident that unlike Tamiya putty, the epoxy won't melt the pla plates and it will give me a stronger material once it has cured in 2 - 3 days.


I am now thinking of putting a thin layer of epoxy all through out the inner side of the butt. I am basically just making sure that I would come up with a really hard shell so that I can do anything with it in terms of modifications and detailing. A hard shell would allow me to bore large holes, cut some parts and scribe panel lines without worrying that the butt would lose it's shape.


P.S. I got the idea of using epoxy from my post of the StarCraft Marine construction by Flanela


As always, thanks for dropping by! Til' next update! :)


Powered by Blogger.