Showing posts with label Glint WIP. Show all posts
thumbnail

AC White Glint - almost, almost done!!!


Ello guys, I could have finished this build today if NOT for running out of Zippo lighter fluid! Dang!!! I hate it whenever I run out of supplies in the middle of work! hate it!


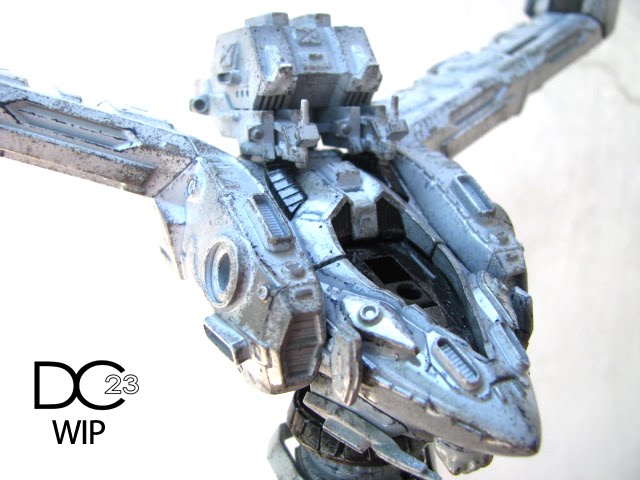
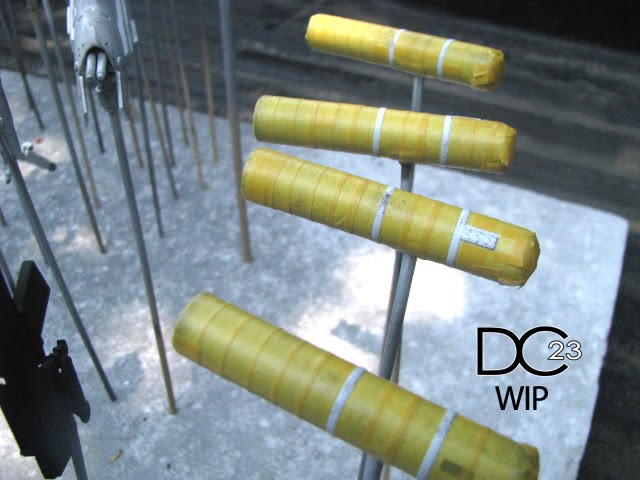
I have masked and painted the black parts of the Vanguard Overed Boost ( V.O.B. ) cylinders earlier today and have also given the White Glint ( WG ) some enamel washes...though I ran out of lighter fluid! I have re assembled a few segments of the V.O.B. and have mostly assemble the White Glint except the legs.


All of the parts are still in gloss coat coz you can only do enamel washes on a glossy surface, a flat surface if applied with enamel washes will absorb the enamels and you can NO longer clean up the excess with cotton swabs. The gun and a few parts are yet to be given enamel washes while other parts just needs swabbing to remove the extra unwanted washes.


Once I get my hands on a can of Zippo, I will then have to clean up the washes with cotton swabs ( dipped in Zippo ) to complete the weathering. I will then have to add black enamel washes along the panel lines and vents and give it it's final flat top coat. Anyways, here are a few pics of the almost finished WG...


The photo below shows a part with uncleaned enamel washes, I need to clean a few parts like this with cotton swabs dipped in Zippo...


Almost done! arrrgh...dang Zippo!


Thanks for viewing...until next post! ;)
thumbnail

AC White Glint - WIP part XVI - last update


Ello guys, this will be my last WIP update of the AC White Glint commission build. I will definitely be shipping this to the US by the end of May ( or even next week ). I have given the parts 4 layers of gloss coat using future straight from the bottle yesterday and have let have it cure overnight to prepare the surface for the enamel washes.


I then mask the parts on the Vanguard Overed Boost ( V.O.B. ) parts that needs to be black with Tamiya tape and I have also painted the black parts of the V.O.B. I will ten have to drybrush the black parts with silver after painting.


This build is almost done, I will have to spray black on the mask V.O.B. parts later, give all the parts an enamel wash of Tamiya flat earth and spray the final flat topcoat. I am still thinking of modding the base that came with the kit and also weather it. Anyways here are a few pics...


END of WIP...see you in the gallery page soon. Thanks for the support! ;)
thumbnail

AC White Glint - WIP part XV - Paint chipping FX


I am currently adding paint chipping effects to the AC White Glint and Vanguard Overed Boost ( V.O.B. ) parts. I am using the usual sponge technique for the small paint chippings ( using a Citadel paint ) and a fine tipped gray Gundam marker for the bigger scratches and paint chippings.


The focus here is to overdo the damages on the WG, specially on the torso, manipulators, feet and legs and make lesser paint chippings on the other parts specially the V.O.B. parts. I think with some proper lighting once the kit is finished, The results of the weathering will be much more evident.


As you can see I have not given the kit an enamel wash yet...after the paint chipping effects I will seal it with future and give it an enamel wash of flat earth. The flat earth will give it a warmer tone and a more realistic feel to the weathering. Anyways here are some pics of my progress so far...


Just dub the sponge in paint and apply carefully to the kit...wipe the excess paint in the sponge for good measure.


Here are parts with sponge paint chipping only...


NOW, here are the parts with both sponge and Gundam marker paint chipping effects...


Thanks for viewing! I have a few more parts to add paint chipping...til' next post! ;D


thumbnail

AC White Glint - WIP part XIV - White parts painted!


Ello guys, I just finished painting ALL of the white parts of both the White Glint and the Vanguard Overed Boost ( V.O.B. ). It took me roughly around 4 hours to finish, 2 bottles of Tamiya flat white and a cup of future. I also managed to paint the V.O.B. boosters and started to paint the guns.


I got tired already, so the guns will be repainted some other time. Hopefully you can see in my lousy pictures that I did some subtle shading with the whites. I first painted the crevices and a few corners with flat black then sprayed flat white all over. The Tamiya acrylic paint retarder worked like a charm as usual and the paint went really smooth.


I also managed to paint the V.O.B. boosters and started by painting the inner parts of the boosters with white...I then painted flat aluminum on the outside and gave the outside some shading using Tamiya smoke. I then sprayed Tamiya clear blue around the edges of the booster to give it a burnt metal effect and to simply add a bit of color to the build ( it is so dang white! ).


I sealed the paints with a mist coat of future...you don't want to overdo future at this point...coz you need to let the Tamiya acrylics cure overnight before sealing it with a few more coats of future. Over coating it with future after painting the acrylics might produce orange peel...so let the acrylics cure first. ;) Anyways, here are some photos I took...


Glad that the paint went smoothly but this is going to be weathered...paint chipping and all. So stay tuned for the next updates. Thanks for dropping by! til' next post! ;)


Powered by Blogger.